When retrofitting a utility substation or expanding perimeter security across a multi-building campus, the transition from installation to operational readiness hinges on thorough commissioning. Integrators often face pressure to accelerate handovers, but skipping systematic checks on cameras and sensors invites cascading issues: desynchronized feeds disrupting VMS integration, environmental sensors triggering false alarms during weather events, or network misconfigurations exposing vulnerabilities in high-stakes environments. This checklist distills years of field experience into a procedural framework that verifies functionality at every stage, minimizing downtime and compliance risks.
Consider a typical upgrade scenario at a remote energy facility, where legacy analog cameras give way to IP-based models with integrated motion and thermal sensors. Without structured commissioning, teams discover incompatible PoE budgets or firmware mismatches only after cabling is buried and walls repainted. By following this guide, security managers and IT teams align on acceptance criteria upfront, fostering smoother collaborations with vendors and reducing post-deployment callbacks. The process emphasizes verifiable outcomes over hasty activations, ensuring sensors contribute meaningfully to threat detection rather than generating noise.
This field guide prioritizes practical workflows over theoretical specs, drawing from deployments in secured perimeters where reliability directly impacts operational continuity. Whether commissioning a handful of edge devices or scaling to dozens across a site, the steps below provide a repeatable path to confidence.
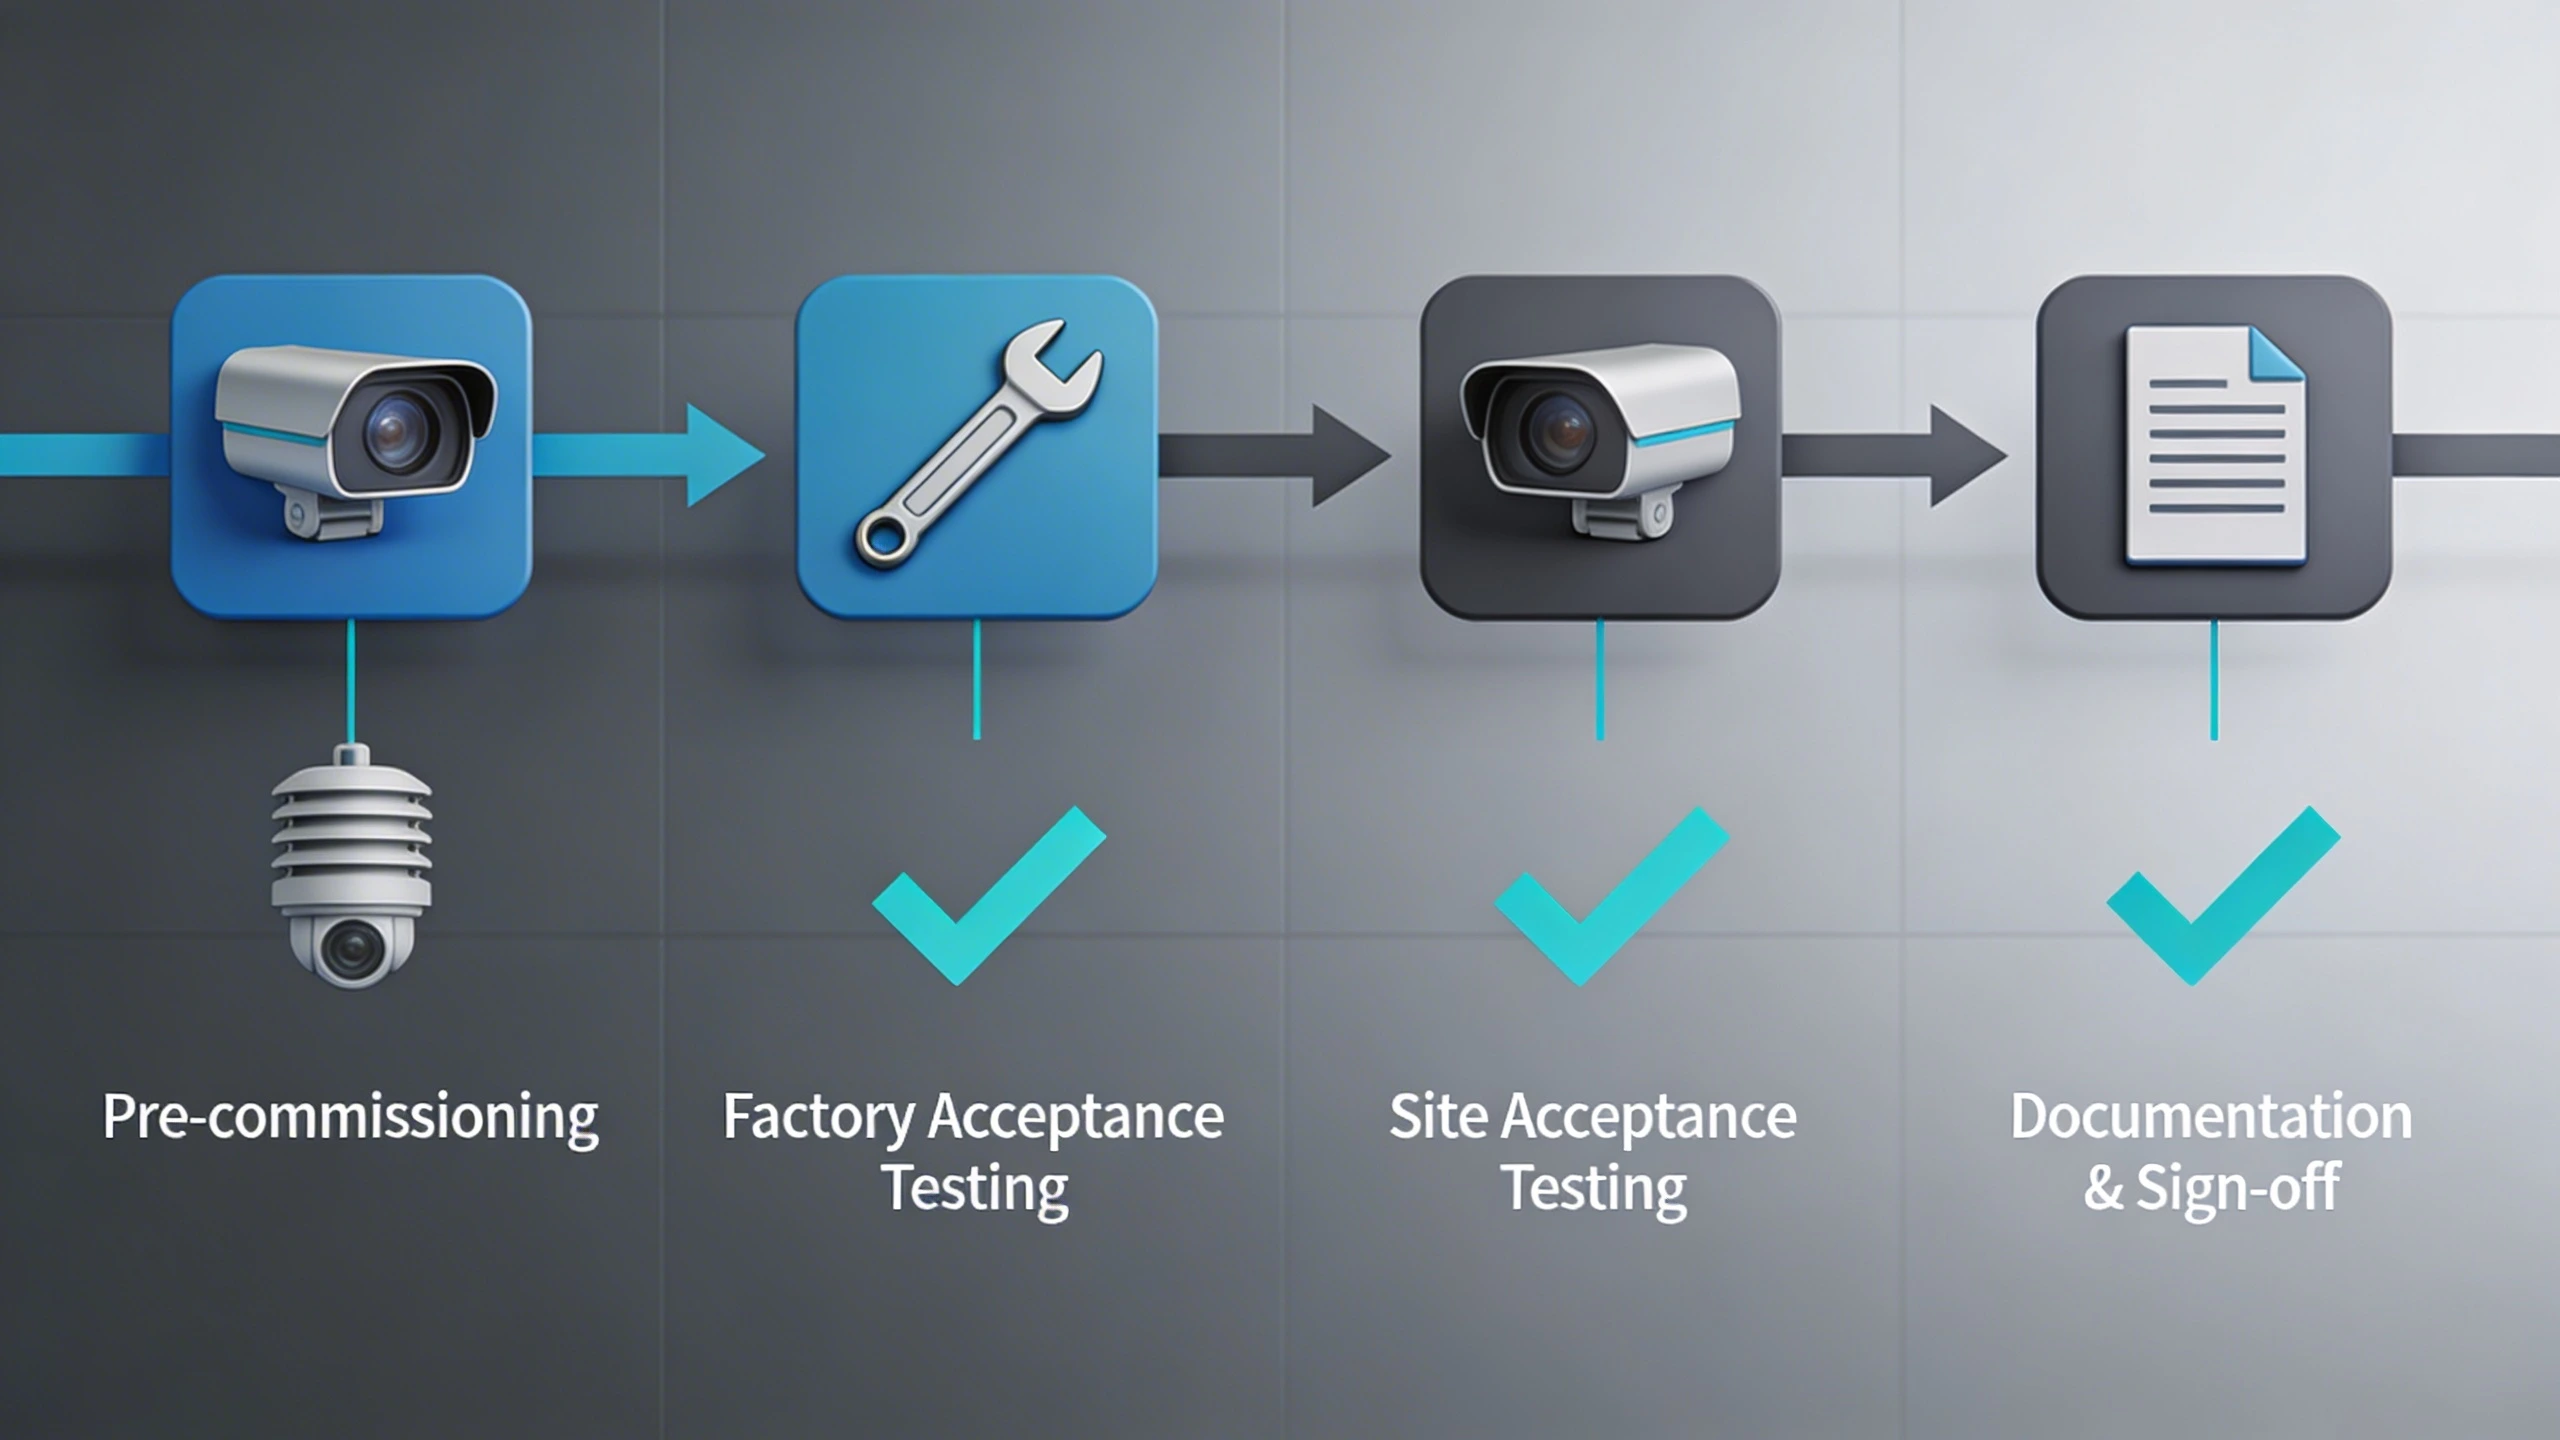
When this checklist should be used
Deploy this checklist at the outset of any camera or sensor rollout where operational assurance is paramount, particularly in critical infrastructure like substations, data centers, or campus perimeters. It's essential during greenfield installs, major retrofits, or even periodic recertifications after environmental stressors such as storms or firmware updates. In retrofit scenarios, such as overlaying thermal sensors on existing PTZ cameras at a utility gatehouse, the checklist prevents integration oversights that could cascade into VMS alert fatigue or missed intrusions.
Teams get it wrong when they treat commissioning as an afterthought, rushing to 'live' status post-installation without bench verification. This leads to on-site surprises like lens obstructions from overlooked mounting hardware or sensor calibration drifts due to unaddressed vibration. Use the checklist specifically before stakeholder sign-off, as it establishes shared criteria that protect integrators from scope creep and end-users from unreliable coverage. For phased deployments, apply it iteratively per segment to maintain momentum without compromising quality.
Pre-commissioning preparation
Before devices leave the bench or arrive on-site, pre-commissioning sets the foundation by confirming hardware integrity, firmware parity, and baseline configurations. Start with a full inventory audit: match serial numbers against purchase orders, inspect lenses for defects, and verify sensor housings for IP ratings suited to the deployment environment, such as IK10 impact resistance for perimeter poles. Network prep involves static IP assignments, VLAN tagging per site diagrams, and initial NTP synchronization to avoid timestamp discrepancies in event logs—a common culprit in multi-device forensics.
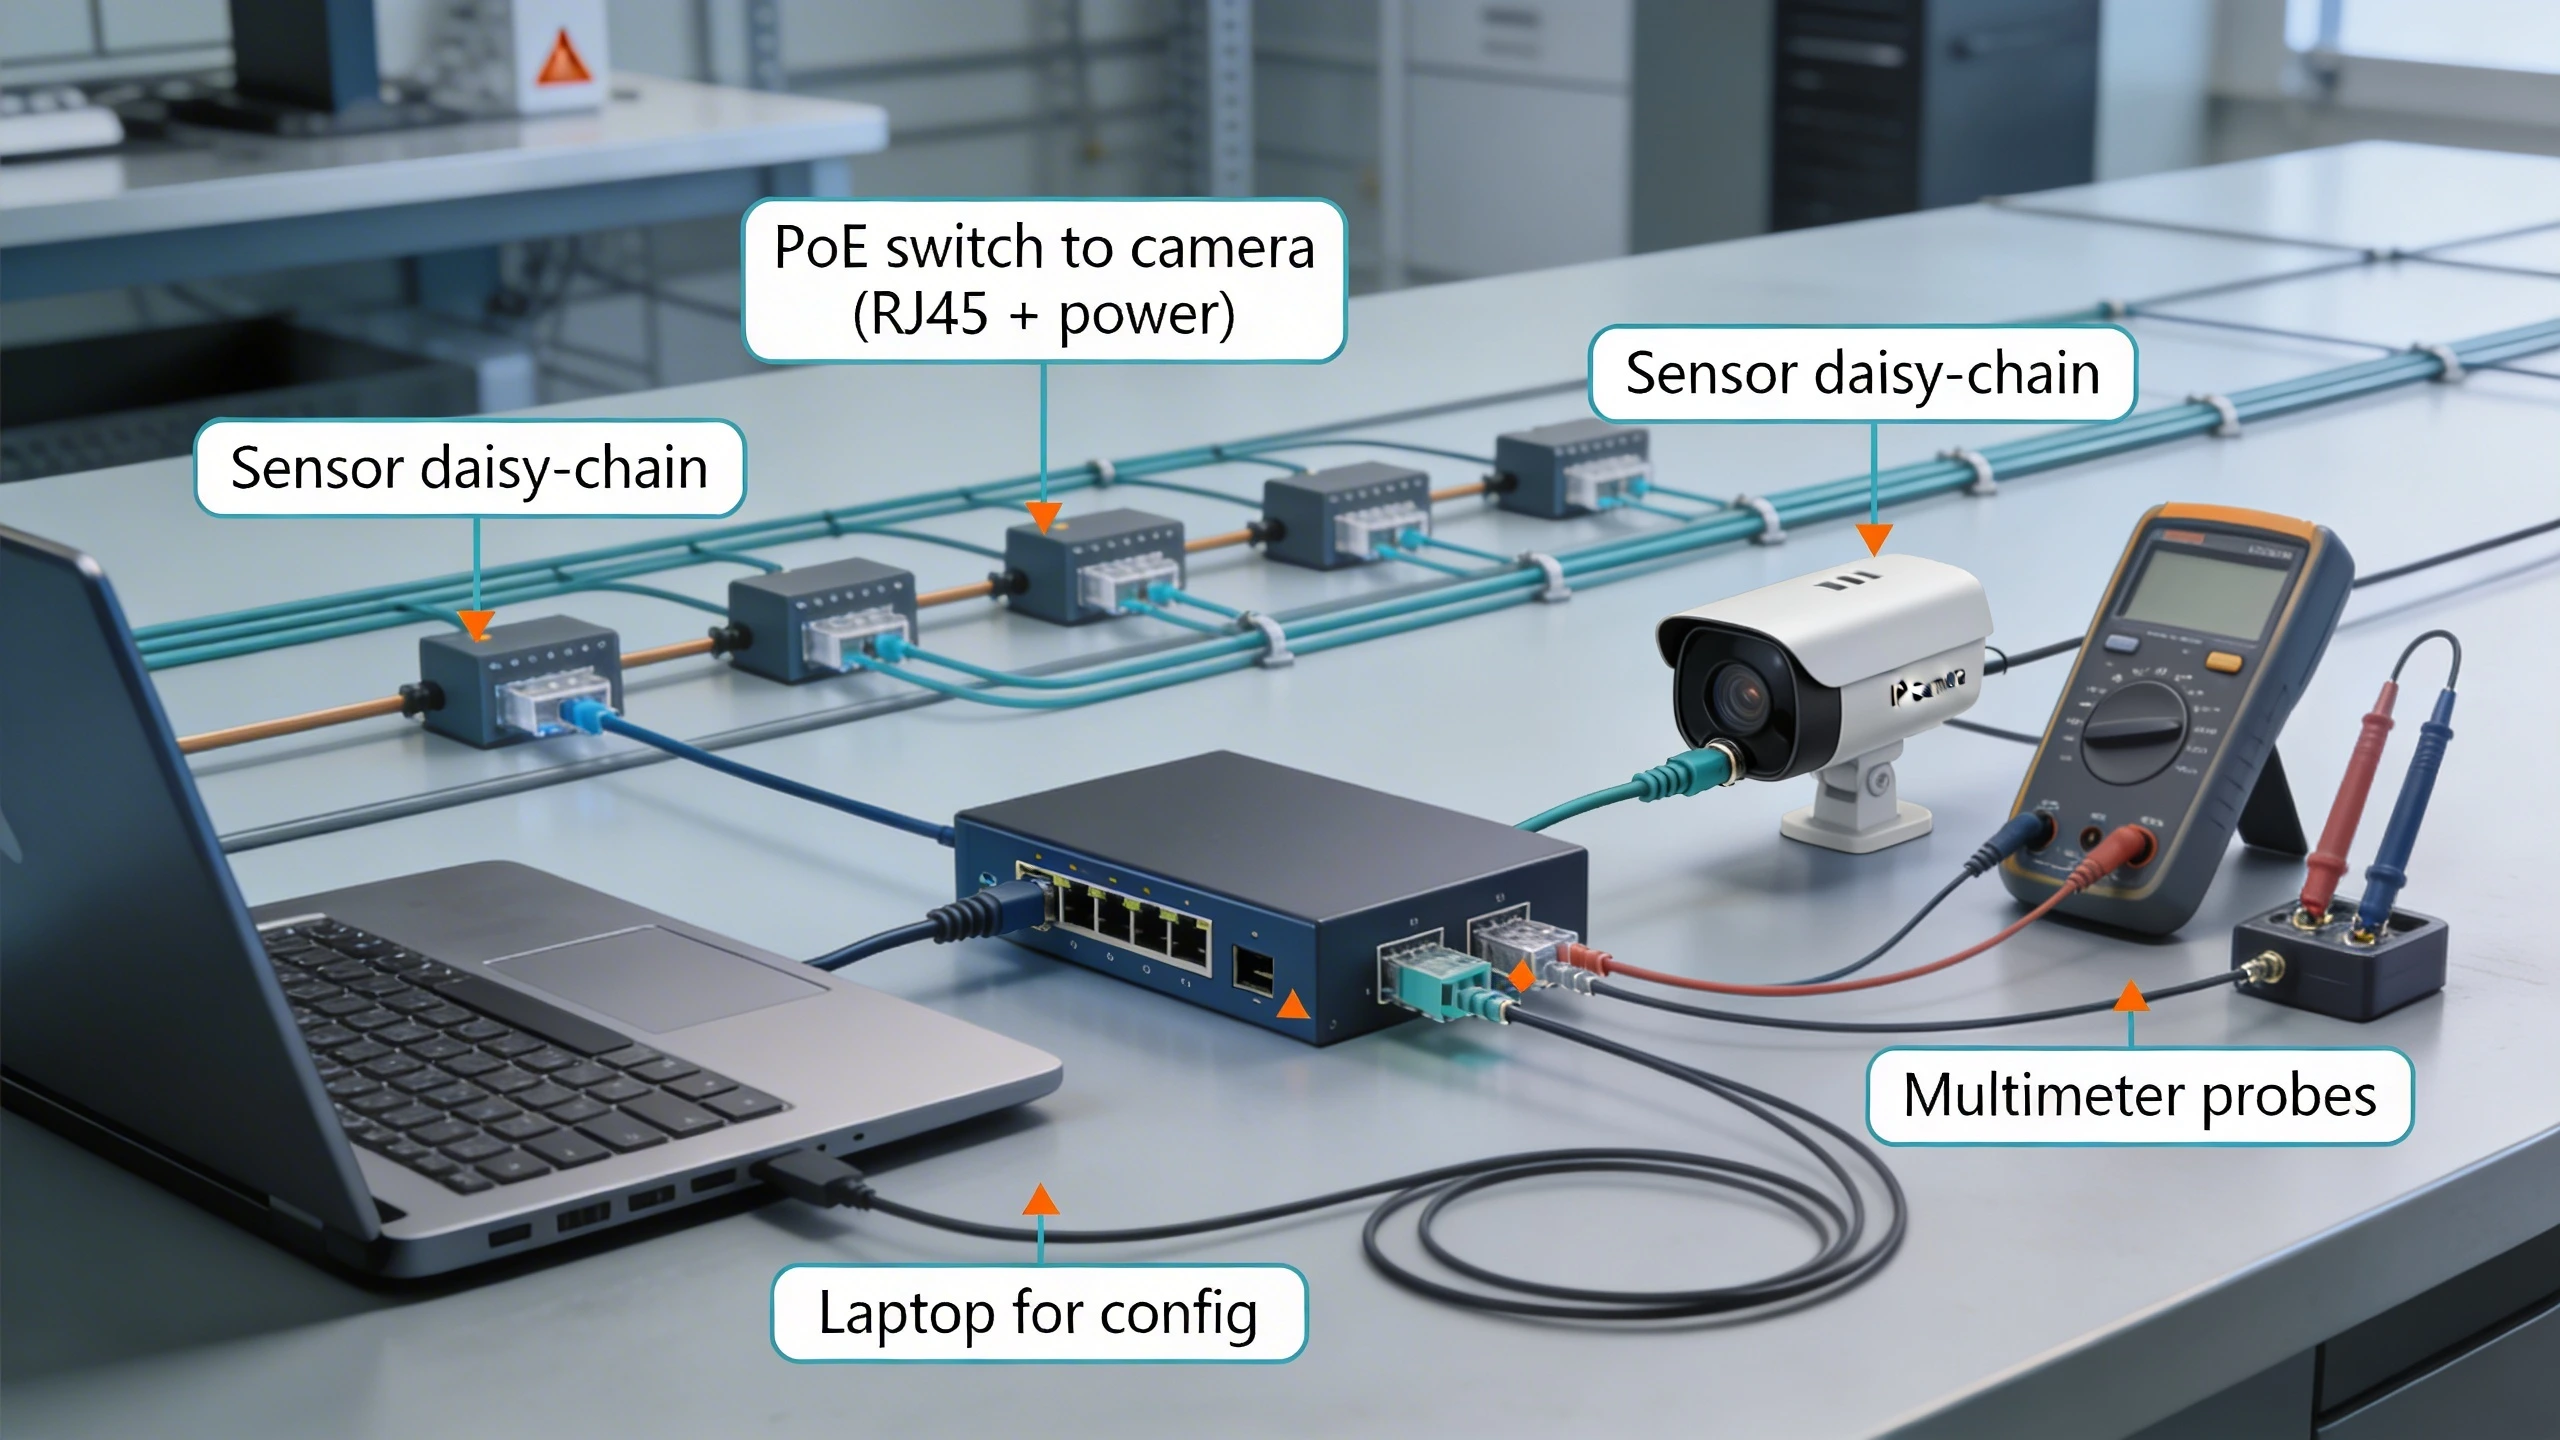
Overlooked prep amplifies site headaches; for instance, untested PoE injectors failing under load can strand remote sensors, while mismatched mounting patterns delay physical installs. Document environmental sims here: expose sensors to simulated humidity or temperature swings to baseline responses. Collaborate with IT on bandwidth projections, ensuring multicast streams won't saturate uplinks. This phase typically uncovers 20-30% of issues early, preserving schedules and budgets in high-assurance projects.
- Verify all cabling terminations and label per as-built schematics.
- Update firmware to the latest stable release and capture hashes for audit trails.
- Conduct power cycle tests to confirm boot sequences and self-diagnostics.
Factory acceptance testing workflow
Factory acceptance testing (FAT) simulates operational stresses in a controlled shop environment, bridging pre-commissioning and site work. Sequence cameras through pan-tilt-zoom sweeps, IR illumination checks at low lux, and sensor triggers using test targets like heat sources for thermals or motion props for PIR. Integrate a temporary VMS instance to validate stream handshakes, latency under simulated loads, and event metadata accuracy. Record baselines for metrics like frame rates and false positive rates, which serve as site benchmarks.
Failures here often stem from overlooked interoperability; a sensor's ONVIF profile might claim compliance but falter on analytics extensions, derailing edge-based rules. Witnessed by client reps, FAT sign-offs mitigate disputes, especially in vendor-agnostic bids. Extend to cybersecurity basics: scan for open ports, enforce HTTPS, and test credential rotations. This workflow catches supply-chain anomalies, like counterfeit optics, before mobilization costs escalate.
- Power up and confirm all indicators (status LEDs, heartbeat pings).
- Run stimulus-response loops: trigger inputs, observe outputs in VMS.
- Stress test with packet generators for network resilience.
- Archive video clips and logs for discrepancy reviews.
Site acceptance testing workflow
On-site, shift to contextual validation: align field-of-view with coverage plans, recalibrate sensors against actual backgrounds, and test under live conditions like wind or rain. Walk-test perimeters to confirm detection zones, adjusting sensitivity to balance nuisance trips with sensitivity. Verify PoE chains end-to-end, monitoring voltage drops across runs exceeding 100m, and confirm failover to secondary paths if redundant. Full-system integration tests exercise alarms routing to control rooms, including audio strobes or gate interlocks.
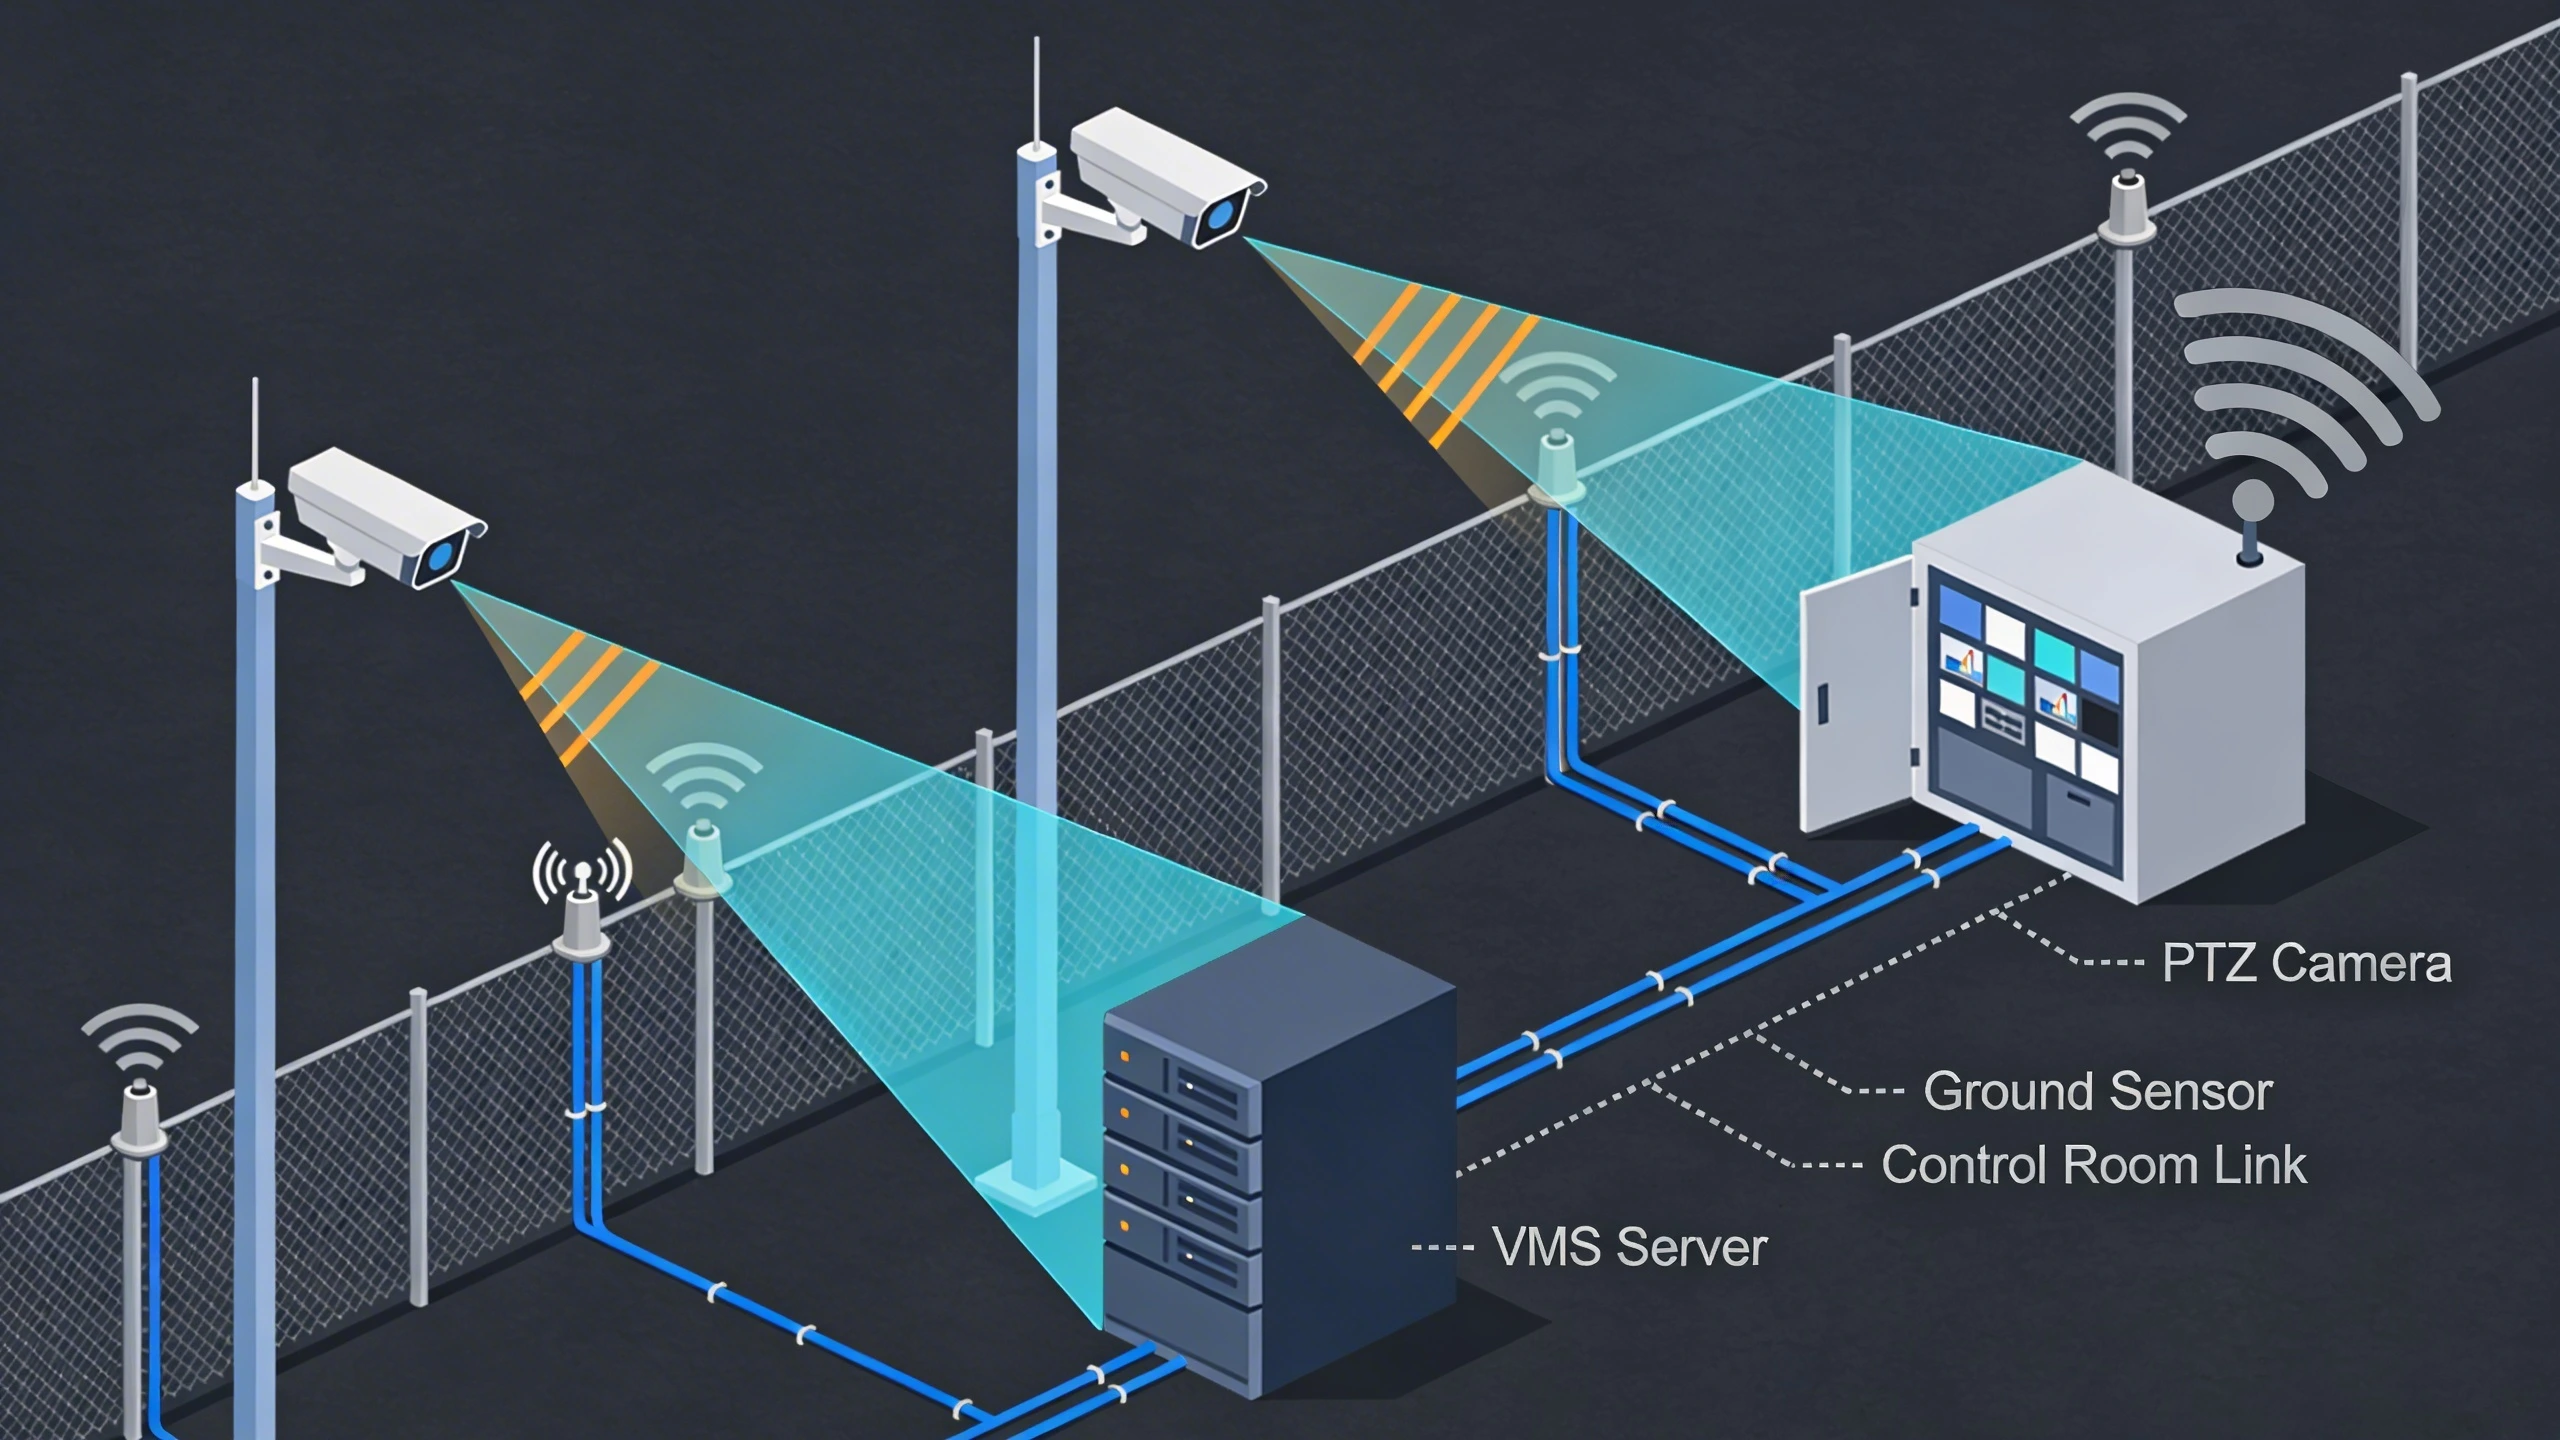
Site-specific pitfalls abound—ground loops inducing noise in analog hybrids or GPS-denied timing drifts—but methodical workflows expose them. In a campus retrofit, for example, overlapping coverages might double-count events unless de-duplication rules are tuned live. Document variances from FAT baselines, attributing to installs like cable bends. This phase culminates in 24-48 hour soaks, logging stability to predict long-term behavior.
- Confirm physical security: tamper switches, cable glands sealed.
- Test in adverse weather: fog for IR, direct sun for WDR.
- Validate analytics with staged intrusions (e.g., drone flybys).
Documentation, sign-off, and common misses
Comprehensive records transform commissioning from a checkbox into a living asset: compile as-builts with heatmaps of coverages, config exports, and test matrices signed by all parties. Include punch lists for deferred items, like firmware holds pending vendor patches, with timelines. Digital twins or 3D models of topologies aid future audits, especially for NTP-synced arrays spanning time zones.
Common misses erode value—unsigned FATs inviting rework claims, or omitted baselines complicating troubleshooting. Handover packets should feature quick-reference diagnostics, like QR codes to config backups. Train ops on daily health checks, emphasizing log rotation to prevent storage floods. Poor docs amplify MTTR during incidents, underscoring the need for versioned repositories accessible to IT and security teams.
Where to go next
For tailored advice on scaling this checklist to your critical infrastructure security needs, explore FortSense 4 capabilities. Integrators handling North America deployments can leverage our ecosystem for seamless VMS integrations.
Ready to review your site plans? Request a design review to align commissioning with best practices.